
|

|
|
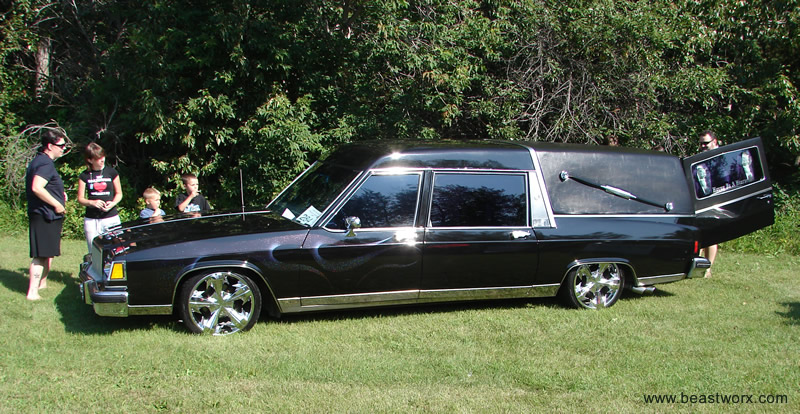
1981 Buick LeSabre Eureka Hearse |
|
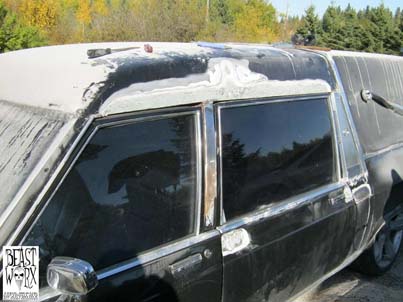
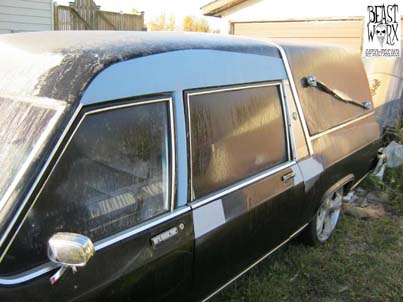
The title pic here shows the stunning ride that is Luke's... As gorgeous as she looks, there's some ugly stuff that's hiding underneath, take some time to go through these photos and see for yourself what is lurking under this shiny facade... |
|
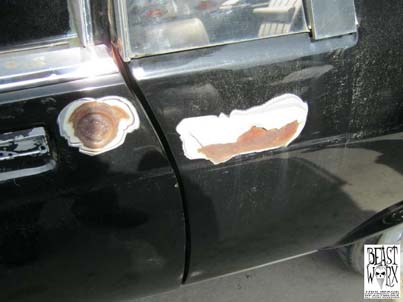
This was a previous bodyshop doing some exploratory work in preparation for an estimate... |
<< CLICK FOR LARGER IMAGE >> |
<< CLICK FOR LARGER IMAGE >> |
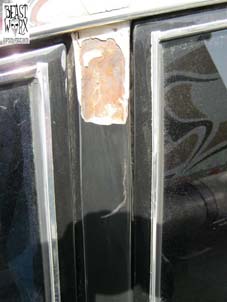
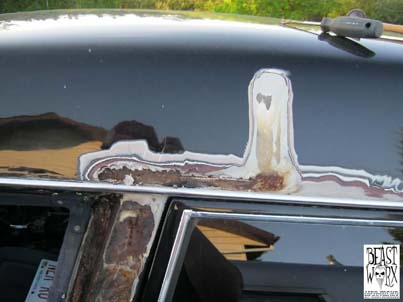
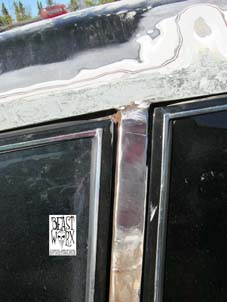
Surface rust and heavy filler are on this driver's side pillar... |
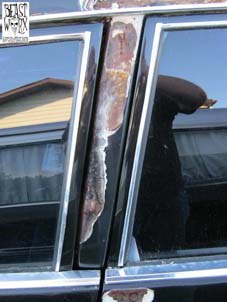
More exploratory work here, this time they went right through the gel coat and exposed the factory roof-to-metal-lamination to de-laminate... |
<< CLICK FOR LARGER IMAGE >> |
<< CLICK FOR LARGER IMAGE >> |
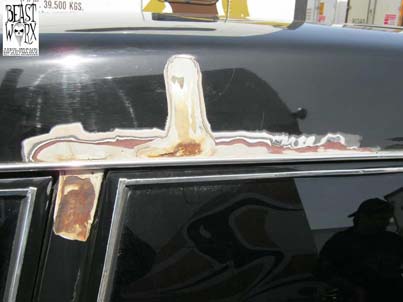
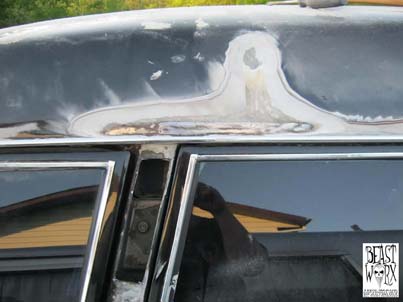
More exposed areas that need attention... |
In this pic you can see more damage in the driver's pillar, that area needs to be removed... |
<< CLICK FOR LARGER IMAGE >> |
<< CLICK FOR LARGER IMAGE >> |
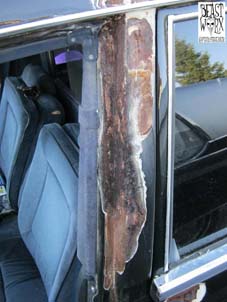
More surface rust on the driver's pillar, what you can't see is the top half was hammered in about 3/4" and was filled with bondo... |
Here is that pillar cut open to repair it properly... |
<< CLICK FOR LARGER IMAGE >> |
<< CLICK FOR LARGER IMAGE >> |
Here is that same pillar repaired with a new piece of metal welded in that will just require a skim coat of filler... |
The passenger side pillar needs some attention as well... |
<< CLICK FOR LARGER IMAGE >> |
<< CLICK FOR LARGER IMAGE >> |
In this pic you can see the de-laminating that is taking place under all that filler and paint... |
Here is the length of roof that has been re-laminated... |
<< CLICK FOR LARGER IMAGE >> |
<< CLICK FOR LARGER IMAGE >> |
And a seal coat to protect the area till paint... |
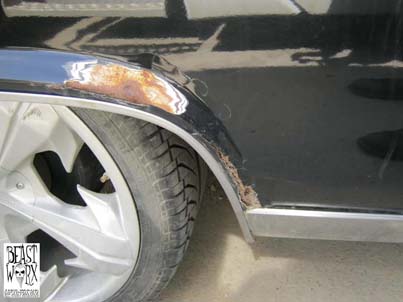
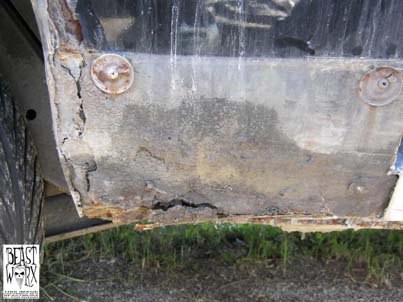
It's interesting, you look at the exposed area in this pic and it doesn't look so bad, but you'll see that this is truly the tip of the iceberg... If you look closer you can see that the rot has gone through the body panel... Hmm, I wonder what's behind that bottom trim... |
<< CLICK FOR LARGER IMAGE >> |
<< CLICK FOR LARGER IMAGE >> |
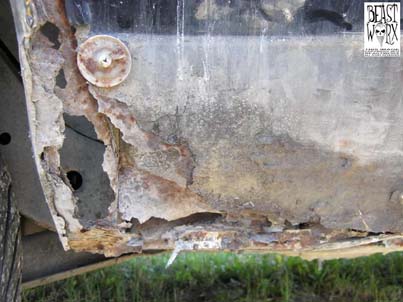
That trims been removed and here is what i found, time to poke and prod the area... |
Inner body panel is rotted as well... |
<< CLICK FOR LARGER IMAGE >> |
<< CLICK FOR LARGER IMAGE >> |
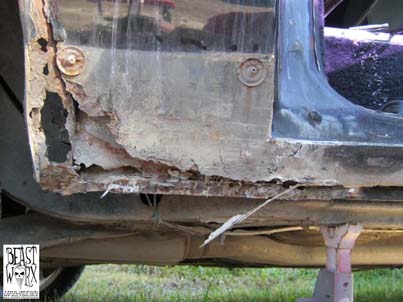
It just keeps growing... |
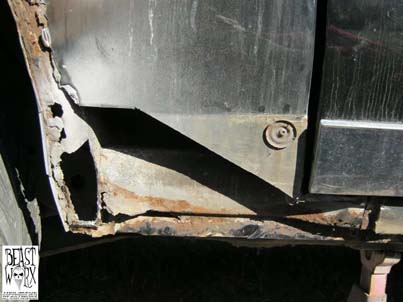
Now that looks better, all the rotten material has been removed, the area has been cleaned up, and it's time to bend some sheet metal... |
<< CLICK FOR LARGER IMAGE >> |
<< CLICK FOR LARGER IMAGE >> |
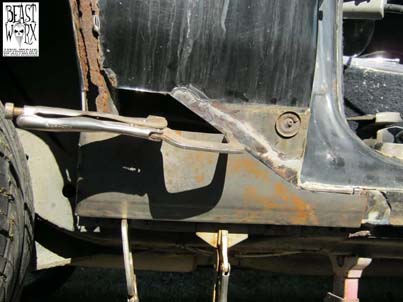
The wheel-well still needs to be addressed... |
The main skin has been fabricated and it has right angled bends in it that you can't see, that replicate what was there from the factory... Time to weld... |
<< CLICK FOR LARGER IMAGE >> |
<< CLICK FOR LARGER IMAGE >> |
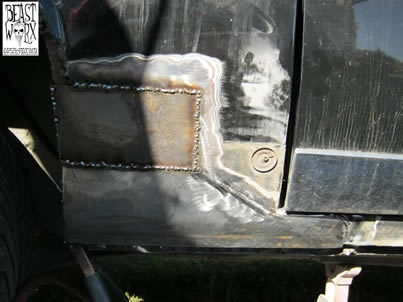
A filler piece welded in place, this area is solid now... On to the wheel-well... |
<< STAY TUNED FOR MORE OF THIS STORY >> |
|


This site's content is the © Copyright 2012 of BEASTWORX ALL RIGHTS RESERVED This web design is the © Copyright 2012 of TODHUNTER.co ALL RIGHTS RESERVED |
||
|